How to connect smartboard to computer
 A smartboard is an interactive whiteboard that allows users to display, write, and manipulate digital content on a large display in smart classroom. Many question were ask on how to connect smartboard to computer to utilize and enhance smartboard expience is essential to make the most of its features, including digital annotation and collaboration. There are two ways to connect a smartboard to a computer – using a wire and wireless connection.
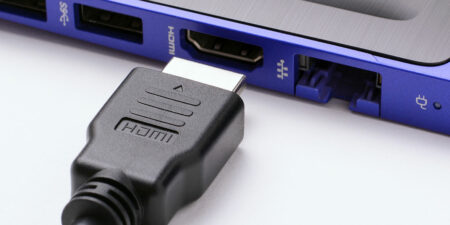
To connect a smartboard to a computer using a wire, the first step is to ensure that the computer has the necessary ports to connect to the smartboard. The most common connection ports are USB, VGA and HDMI. Once the ports are confirmed, the next step is to connect the smartboard to the computer using a compatible cable. The cable may come with the smartboard or can be purchased separately.
how to connect smartboard to computer (wire version), follow these steps:
- Turn on the computer and smartboard and disconnect all cables from the computer.
- Connect the HDMI cable from the smartboard to the HDMI port on the computer. If the smartboard has a USB port, connect the USB cable to the computer’s USB port.
- Power on the smartboard and then the computer.
- Install the smartboard software on the computer, which should be provided with the smartboard.
- Follow the software prompts to calibrate the smartboard to the computer. This process aligns the smartboard’s interactive display with the computer’s display.
- Once the calibration process is complete, the smartboard is ready to use with the computer.
How to connect smartboard to computer (wireless version), follow these steps:
- Turn on the smartboard and enable wireless connectivity by pressing the wireless button on the smartboard or using the smartboard’s software.
- Ensure that the computer has Bluetooth or Wi-Fi capability and is enabled.
- On the computer, search for available Bluetooth or Wi-Fi devices and select the smartboard from the list of available devices.
- If prompted, enter the smartboard’s passcode or PIN, which is usually provided with the smartboard.
- Install the smartboard software on the computer and follow the software prompts to calibrate the smartboard to the computer.
- Once the calibration process is complete, the smartboard is ready to use wirelessly with the computer.
What is the benefits to connect other external screen ?
- Larger display: The external screen allows for a larger display, making it easier for everyone in the room to see what’s on the Smartboard. This can be especially helpful in larger classrooms or meeting rooms.
- Improved visibility: An external screen with a high-resolution display can make it easier to read small text or view detailed images, which can be particularly useful in educational or business settings where detailed information is being presented.
- Increased engagement: By displaying content on a larger screen, students or participants may become more engaged with the lesson or presentation, which can improve learning outcomes or increase productivity.
- More flexible teaching and presenting options: With an external screen, it is possible to show different content on the Smartboard and the external display simultaneously. For example, a presenter can display a presentation on the external screen while keeping notes on the Smartboard.
- Better accessibility: An external screen can be positioned at a more comfortable viewing height for people who may have difficulty seeing content on the Smartboard due to its placement or height.
Image Gallery
[KClientError] [REQ_ERR: OPERATION_TIMEDOUT] [KTrafficClient] Something is wrong.

